Lead Magnet aka freebie aka opt-ins are all the craze in the world of online marketing these days. I was subscribing to lead magnets before I even knew what they were. They are simply a way for a marketer to offer an ethical “bribe” or freebie in exchange for your name and email addresses. This is more commonly known as a lead. Today, we are going to discuss how to design a lead magnet everyone wants.
Why are they so popular? Well let’s be honest, who is really going to offer their email address for nothing in exchange? E-mail lists are where the money is for business owners these days. Statistics show that a consumer has to be exposed to a product at least seven times before making a buying decision. What better way can a business drip on a buyer than through an email marketing campaign.
Let’s dive into the steps to creating a kickass lead magnet that everyone will want.
Choose the Freebie
You want to begin by choosing what type of freebie you will offer your audience. Unless you are just a natural digital marketer you may be like me and be pulling your hair out trying to decide what you should offer. Let me offer some tips on how to choose your freebie.
Tips for Choosing the Freebie:
- Grab a piece of paper and brainstorm ideas for 10 minutes. Set a timer. Just write down everything that comes to mind keeping your ideal client in mind. Think of problems that your ideal client may have and what solutions you may could provide. In what format would you provide that solution?
- Check out your competition for ideas of what they are offering. DO NOT COPY THEIR FREEBIES
- The freebie needs to be something that your ideal client can use right away and see fast results. It doesn’t need to require much effort. If it is too time consuming or complex, people are not going to be interested.
- A good lead magnet is going to solve a problem of your ideal client with an easy to use freebie. It will be simple for them to understand, use, and implement.
Some great examples of great converting Lead Magnets are:
- Checklist
- Cheat sheet
- Videos
- Swipe Files
- Templates
- Resource Centers
You now have decided on your Lead Magnet, it is time to move on to capturing your ideal client’s name and email address.
Create the Lead Magnet
Create the actual give away. If it is a pdf, it can be created in Canva, Word, or Google Docs. I personally create most of my freebies in Canva. Canva is just so easy to use.
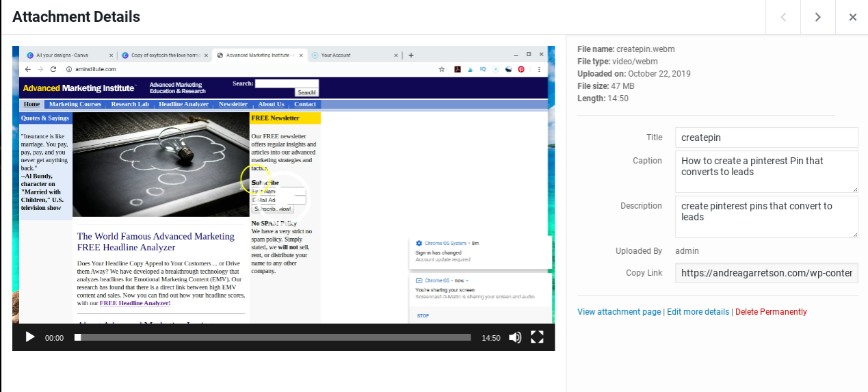
- Give the Freebie a catchy title. You can use the Advanced Marketing Institute to analyze your title.
- Brand your Freebie. You are going for brand recognition. Every chance you can get for your ideal client to see your logo and brand colors makes you more known. Remember the know, like, and trust factor.
- Use a proper file name. Save your freebie with your Blog name_ freebie name.pdf. Again, the know, like, and trust factor
- Add a cover page. Not many people add a cover page. This will set you apart from the competition. Introduce yourself. This may be the only chance for you to connect with the audience member.
- End with a Call to Action. Make sure you are leading the client in the direction that you are wanting them to go. It may be to join your Facebook Group, Subscribe to your Youtube Channel, or schedule a call with you. Just make sure you are leading them. People don’t like to feel lost.
- Make sure you are delivering massive value with your lead magnet. Over deliver!!! Make them think if this is the free content, what in the world will the paid content be like!
Capturing the Leads
You got the actual freebie created. It is time to set up the lead magnet,so you can start capturing those names and email addresses. You can design a lead magnet in a couple different ways. Let’s begin by explaining the difference between some forms because honestly, I didn’t know the difference. They do make a difference in your conversion rates.
Landing Pages: In marketing terms, this is a page that is used to capture your leads. Your opt-in form lives on this page.
- The landing page can set up on your own website or can be set up using an email service provider such as Mailerlite or Aweber.
- The landing page can be embedded into your website or you can simply point people to the URL to sign up for the email list and grab your free lead magnet.
Opt-in Forms used solely for collecting email addresses and no lead magnet is tied to it.
Opt-in forms are used within landing pages to collect the email addresses. They are used solely to collect email addresses and usually no lead magnet is attached.
Opt-in forms cannot be used without a website like a landing page can. They usually appear either within the content on a website or on the sidebar of a website’s page.
The conversion rate for signups for an opt-in form will not be as good as using a landing page.
Opt-in Box or Subscriber Box: This is a small box on a website that asks for the website visitors to sign up for a mailing list. They can be in the form of a popup, side bar, or on the top of the website.
Now that you have an understanding of the different ways to collect email addresses, let’s continue on to how to set up the lead magnet using a landing page.
Choosing an Email Service Provider
I personally use Mailerlite currently for my email service provider. You can read my post about why I changed to Mailerlite here. For the purpose of this blog post, I will be referencing setting up a landing page through Mailerlite because of the free service that they offer.
Mailerlite provides several different templates that you can use for setting up your landing pages, emails, or newsletters. You can create a series of auto-responders to follow up within the platform. It is as simple as fill in the blank.
With Mailerlite, you are allowed on the free plan a 1000 subscribers and 12,000 emails each month and once you surpass that amount, you will need to upgrade to the next pricing tier of $10/month. They also have a WordPress plugin which allows you to easily capture email subscribers with just a few clicks from within your website.
To get started with Mailerlite, begin by signing up for an account. Once you have your account, you want to set up your group (tag). To do this, follow these steps:
- Go to the Mailerlite dashboard
- Go to Subscribers and choose Groups
- On the next page, you will fill in the details like the name of your group
Create Opt-in Form
Now that you have the group that you will assign the people who opt in to your offer to, it’s time to create your Opt-in Form.
- Go to forms (Make sure Landing Pages is selected)
- Click Create Landing Page
- Choose the group that your Landing Page is for
- Choose a template and start designing
- Save any changes you make to the template
Congratulations, friend! You have your first landing page created. Now it’s time to focus on getting the lead magnet to your new lead.

Delivering the Freebie
Let’s recap what you have done so far. You have created the lead magnet and set up your landing page. Now it is time to decide how you will deliver your lead magnet to your new lead.
So how do you do that? You have two options. You can deliver it via email (as a link or a direct download) or on a specific download page.
Those are the only two options. The simplest way is to deliver it via an email. Let me explain to you how you do this because friends, I struggled with that. I want to save you with having to You tube it like I had to do. Remember, your girl here, is not very techy.
Remember how we created the lead magnet in Canva. Yes??? Okay, what you are going to do is:
- Go into Word Press if you have a blog
- Go to Media
- Click add new
- Select and add the lead magnet from your computer into the media account
- Click on your file, and on the right of the screen you will see Copy link. Copy this link for the URL to the lead magnet to use for the download
- Use this URL in the email for the new lead to click on to download the lead magnet

Pretty simple, right!
Now you have the whole lead magnet creation process completed, so what the heck do you do with it now? How do people even see this offer for the freebie?
Where will you promote the Lead Magnet?
- Blog within your blog posts.
Blog
Let’s talk about your blog for a minute here, so you want to offer the lead magnet in a couple of places within the blog posts. Let me be the first to say, this is one of two mistakes that I have made and have paid the price for it. I was only putting one opt-in offer per blog posts, and it was not converting. You should have one at the very top of the blog because it will be the very first thing that the reader will see and somewhere else throughout the posts. Don’t be afraid to put multiple opt-in offers in the post.
Pinterest
If you do not have a blog and you want to link directly to your landing page, you can from Pinterest. Create an attractive Pin and use your URL for the landing page for the destination URL for the Pin.
Again if you do not have a blog, you can use your landing page’s URL in a post on Facebook to direct them to the landing page. Now, you want to add some value before posting that URL otherwise you are going to appear to be spamming.
Creating and delivering a lead magnet can seem like an overwhelming task at first but hopefully you feel a little less stressed about it now. As always, I try to create content around things that I struggled with in this journey.
Just remember, you are just one freebie away from rocking this business! Let’s go!!!

